Publishing Lectures#
This page provides instructions on how to update the live content that is
hosted on GitHub Pages. GitHub Pages is a service provided by GitHub that acts
as a host for static web sites, such as those generated by jupyter-book.
There are three publishing pathways available:
Note
QuantEcon is transitioning away from gh-pages branch-based deployment
(using peaceiris/actions-gh-pages)
towards the native GitHub Pages artifact deployment (using
actions/deploy-pages).
The target architecture is the reusable
quantecon/actions library, which wraps the native
artifact deployment in a publish-gh-pages action;
lecture-dp is the reference implementation. Most active lecture
repositories have now migrated to the native artifact path — the majority via quantecon/actions, with a
couple of repositories deploying through inline workflow steps as a transitional form — leaving only a
couple still on the legacy gh-pages branch workflow. See the
lecture deployment table for the current per-repo status.
Build and Publish via GitHub Release#
You can use GitHub Actions to build the main branch and publish directly to GitHub Pages by
tagging a New Release as a web based workflow.
QuantEcon repositories are also setup to provide previews of the html
when submitting changes either via pull request or main branch updates.
Workflow#
To build and publish the current main branch you create a GitHub release:
Use your browser and open the
repopage on GitHub such as lecture-python.mystClick on
Releases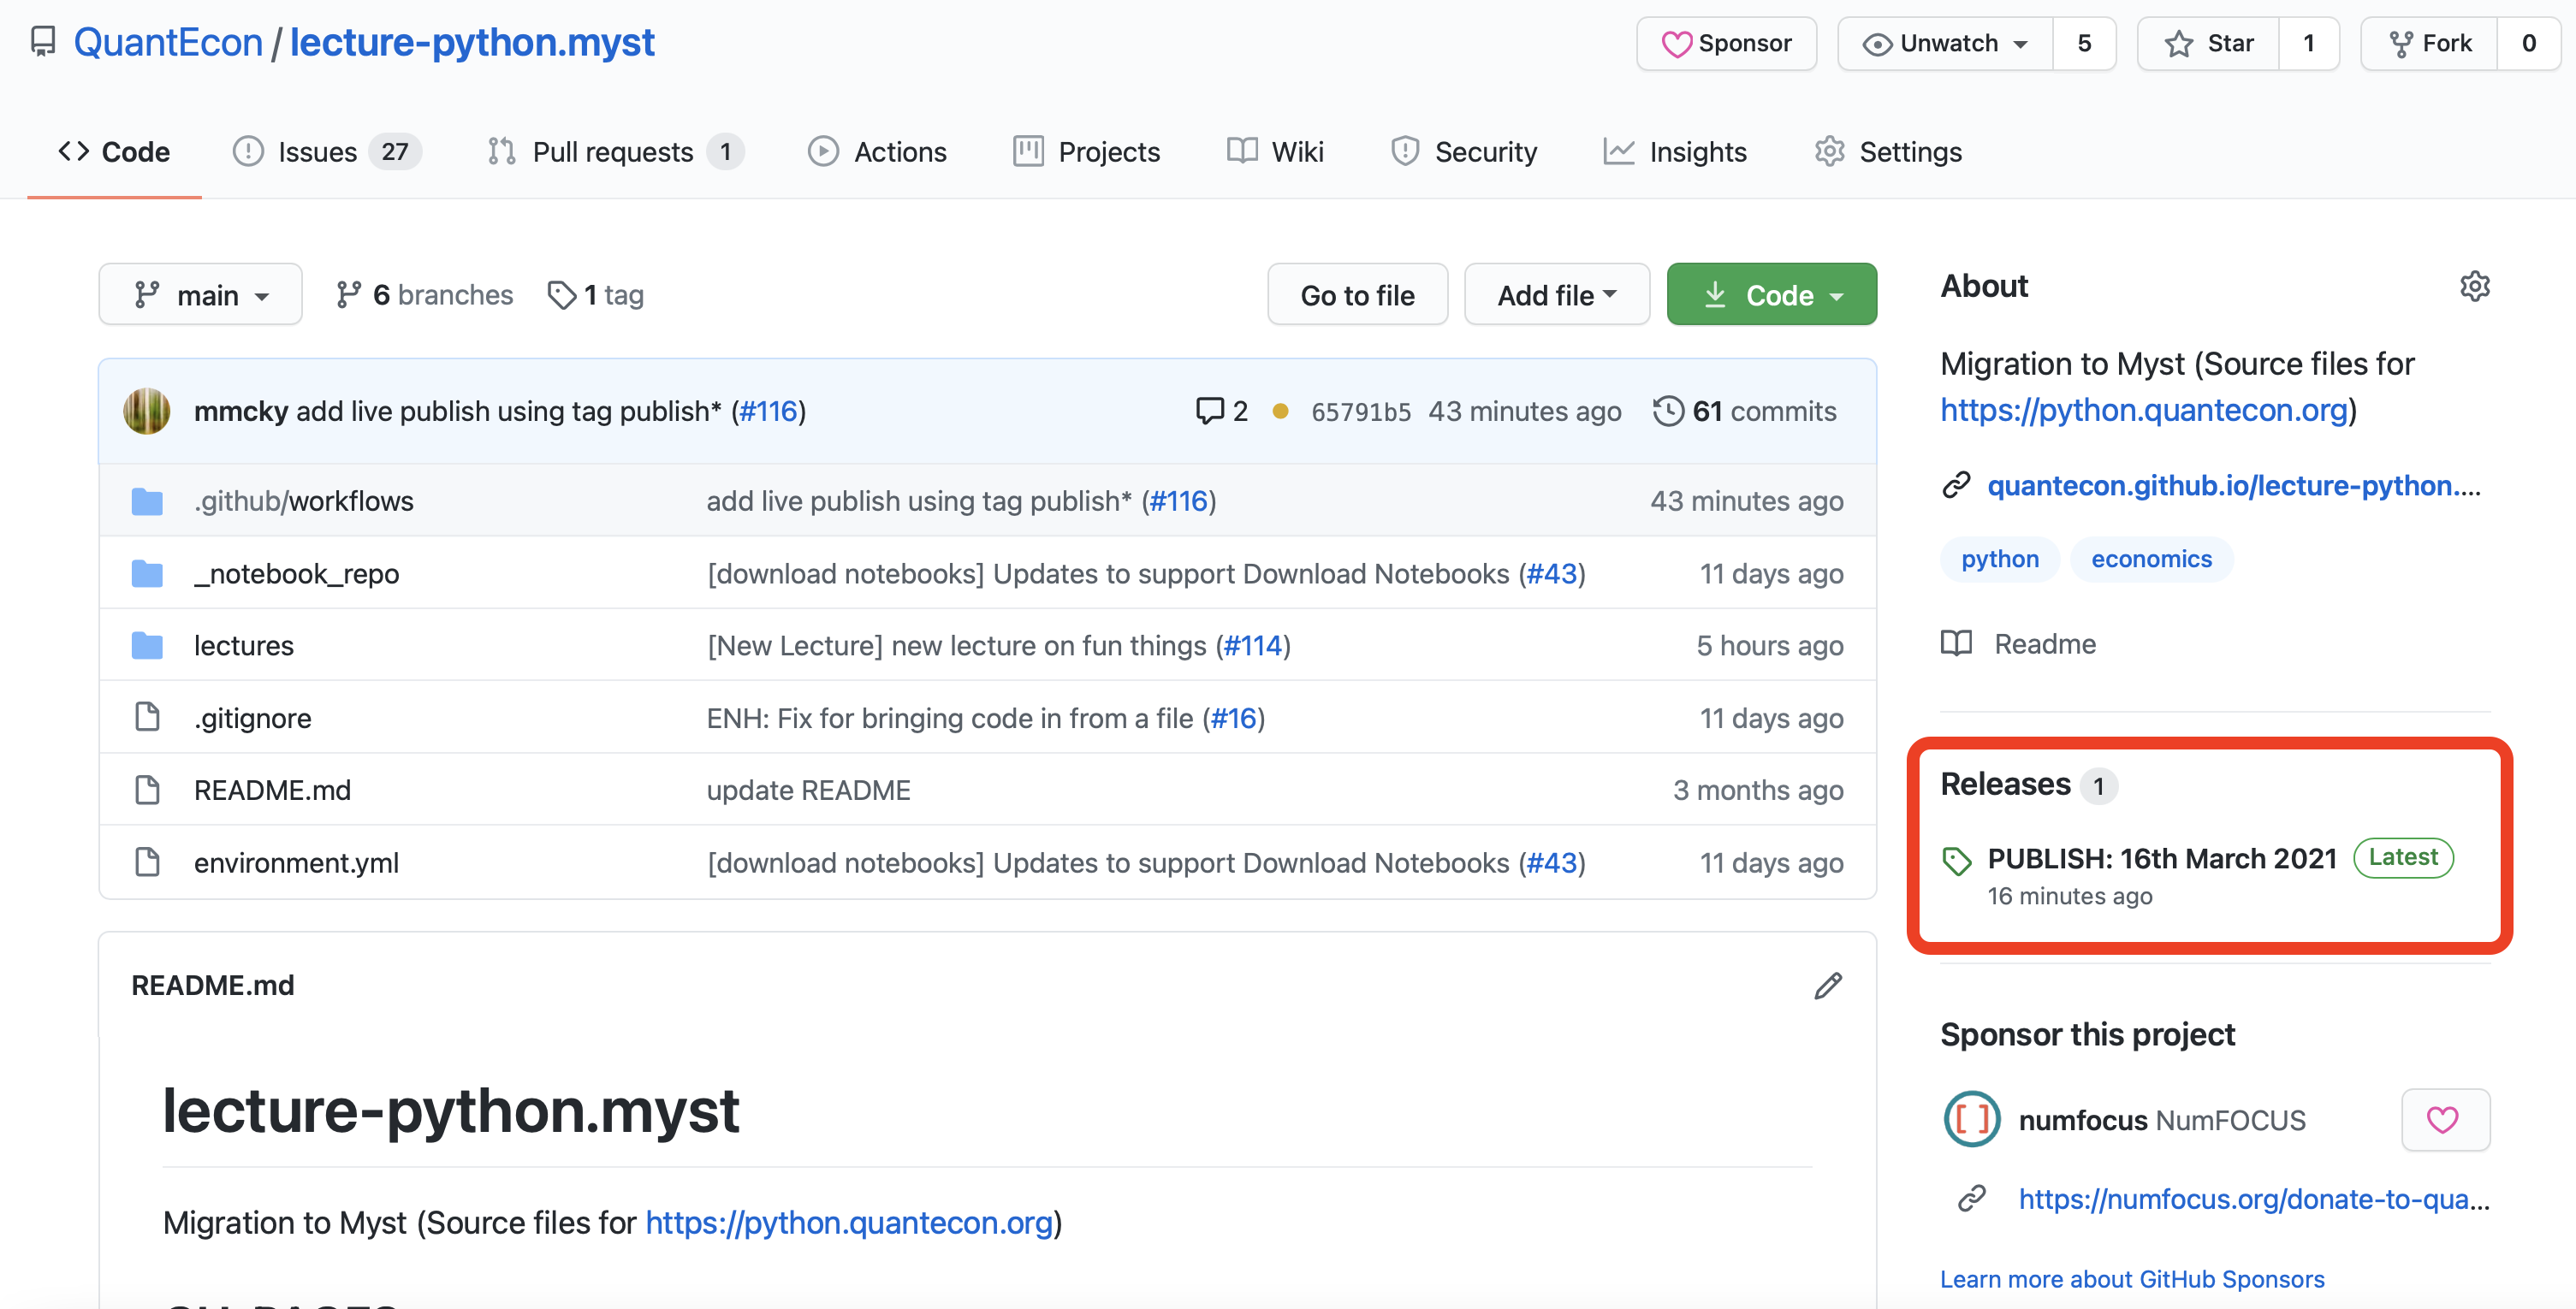
Click on
Draft a new release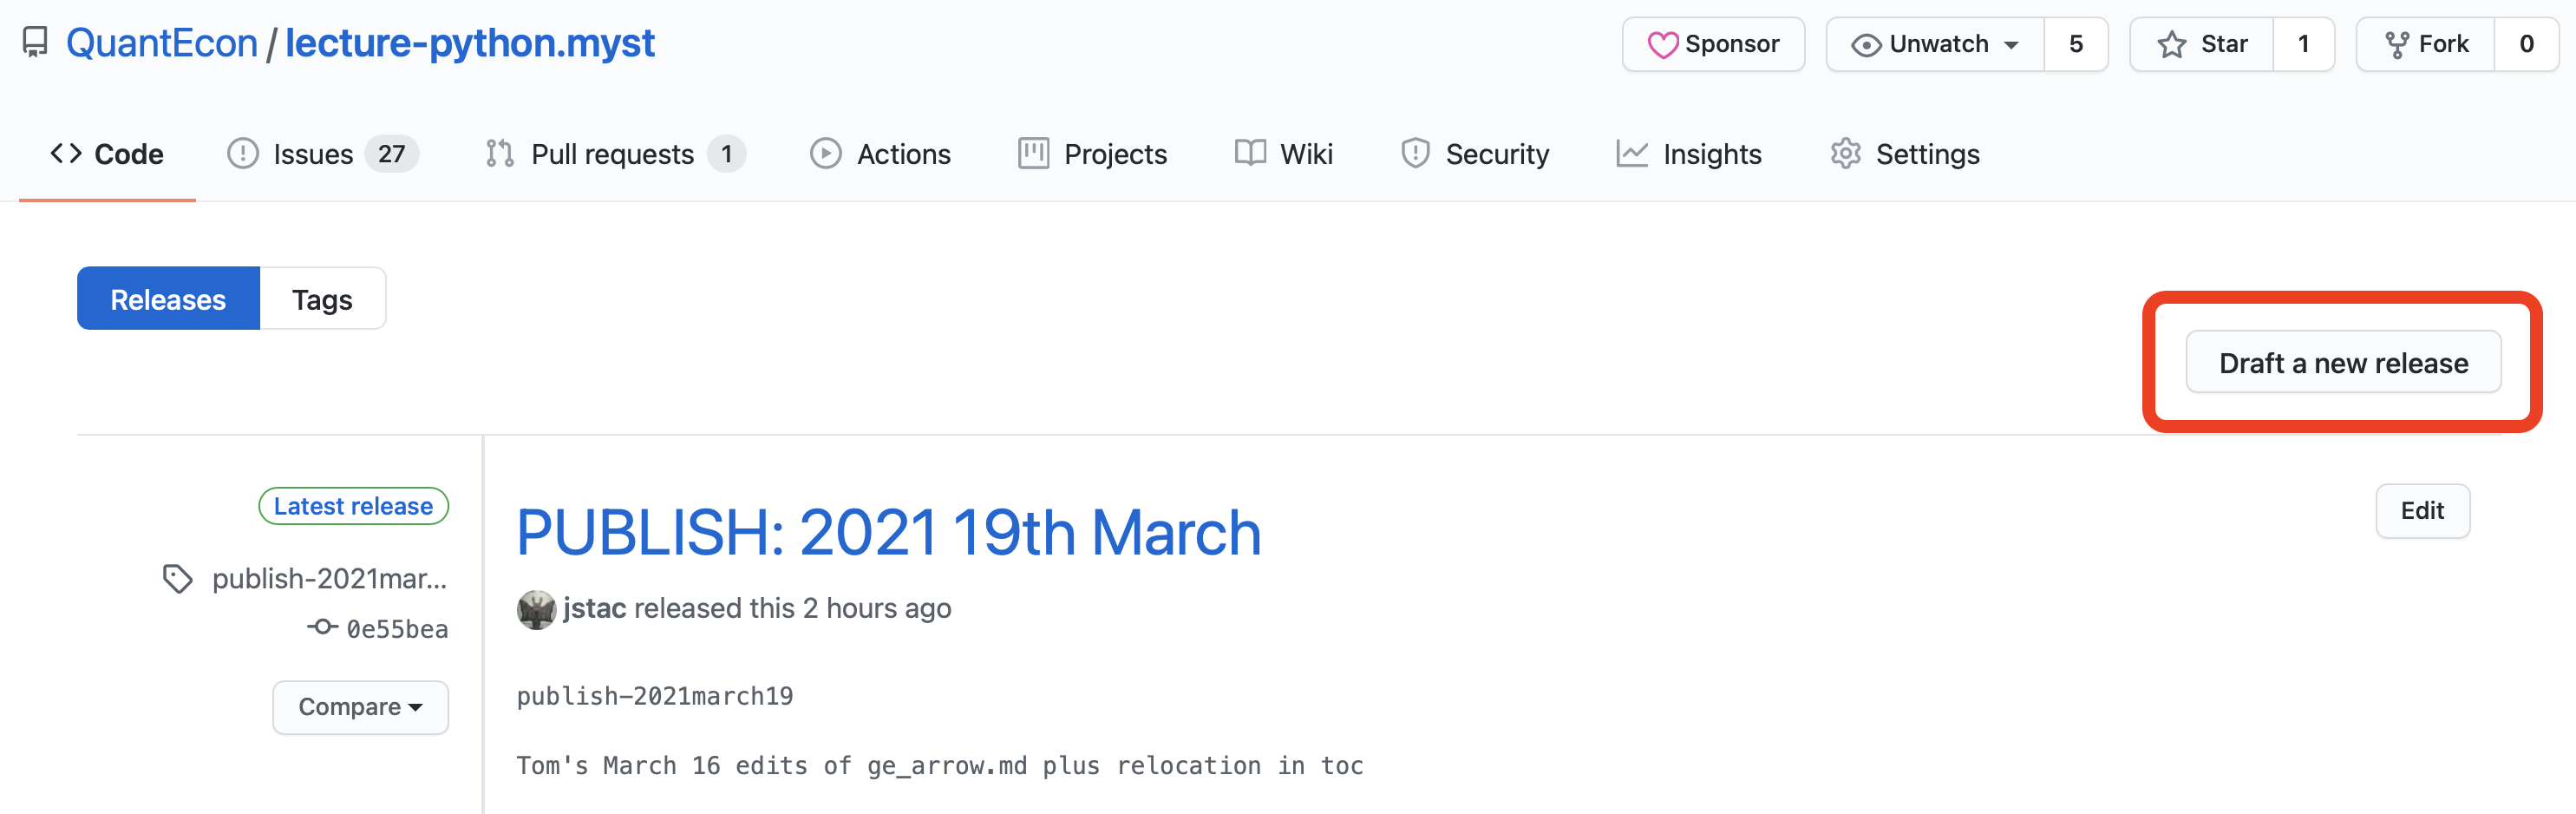
You will see an empty
tagfield andtitlefield
Add a
tagfollowing the patternpublish-<date>such aspublish-2021march16and update the title such asPUBLISH: 16th March 2021.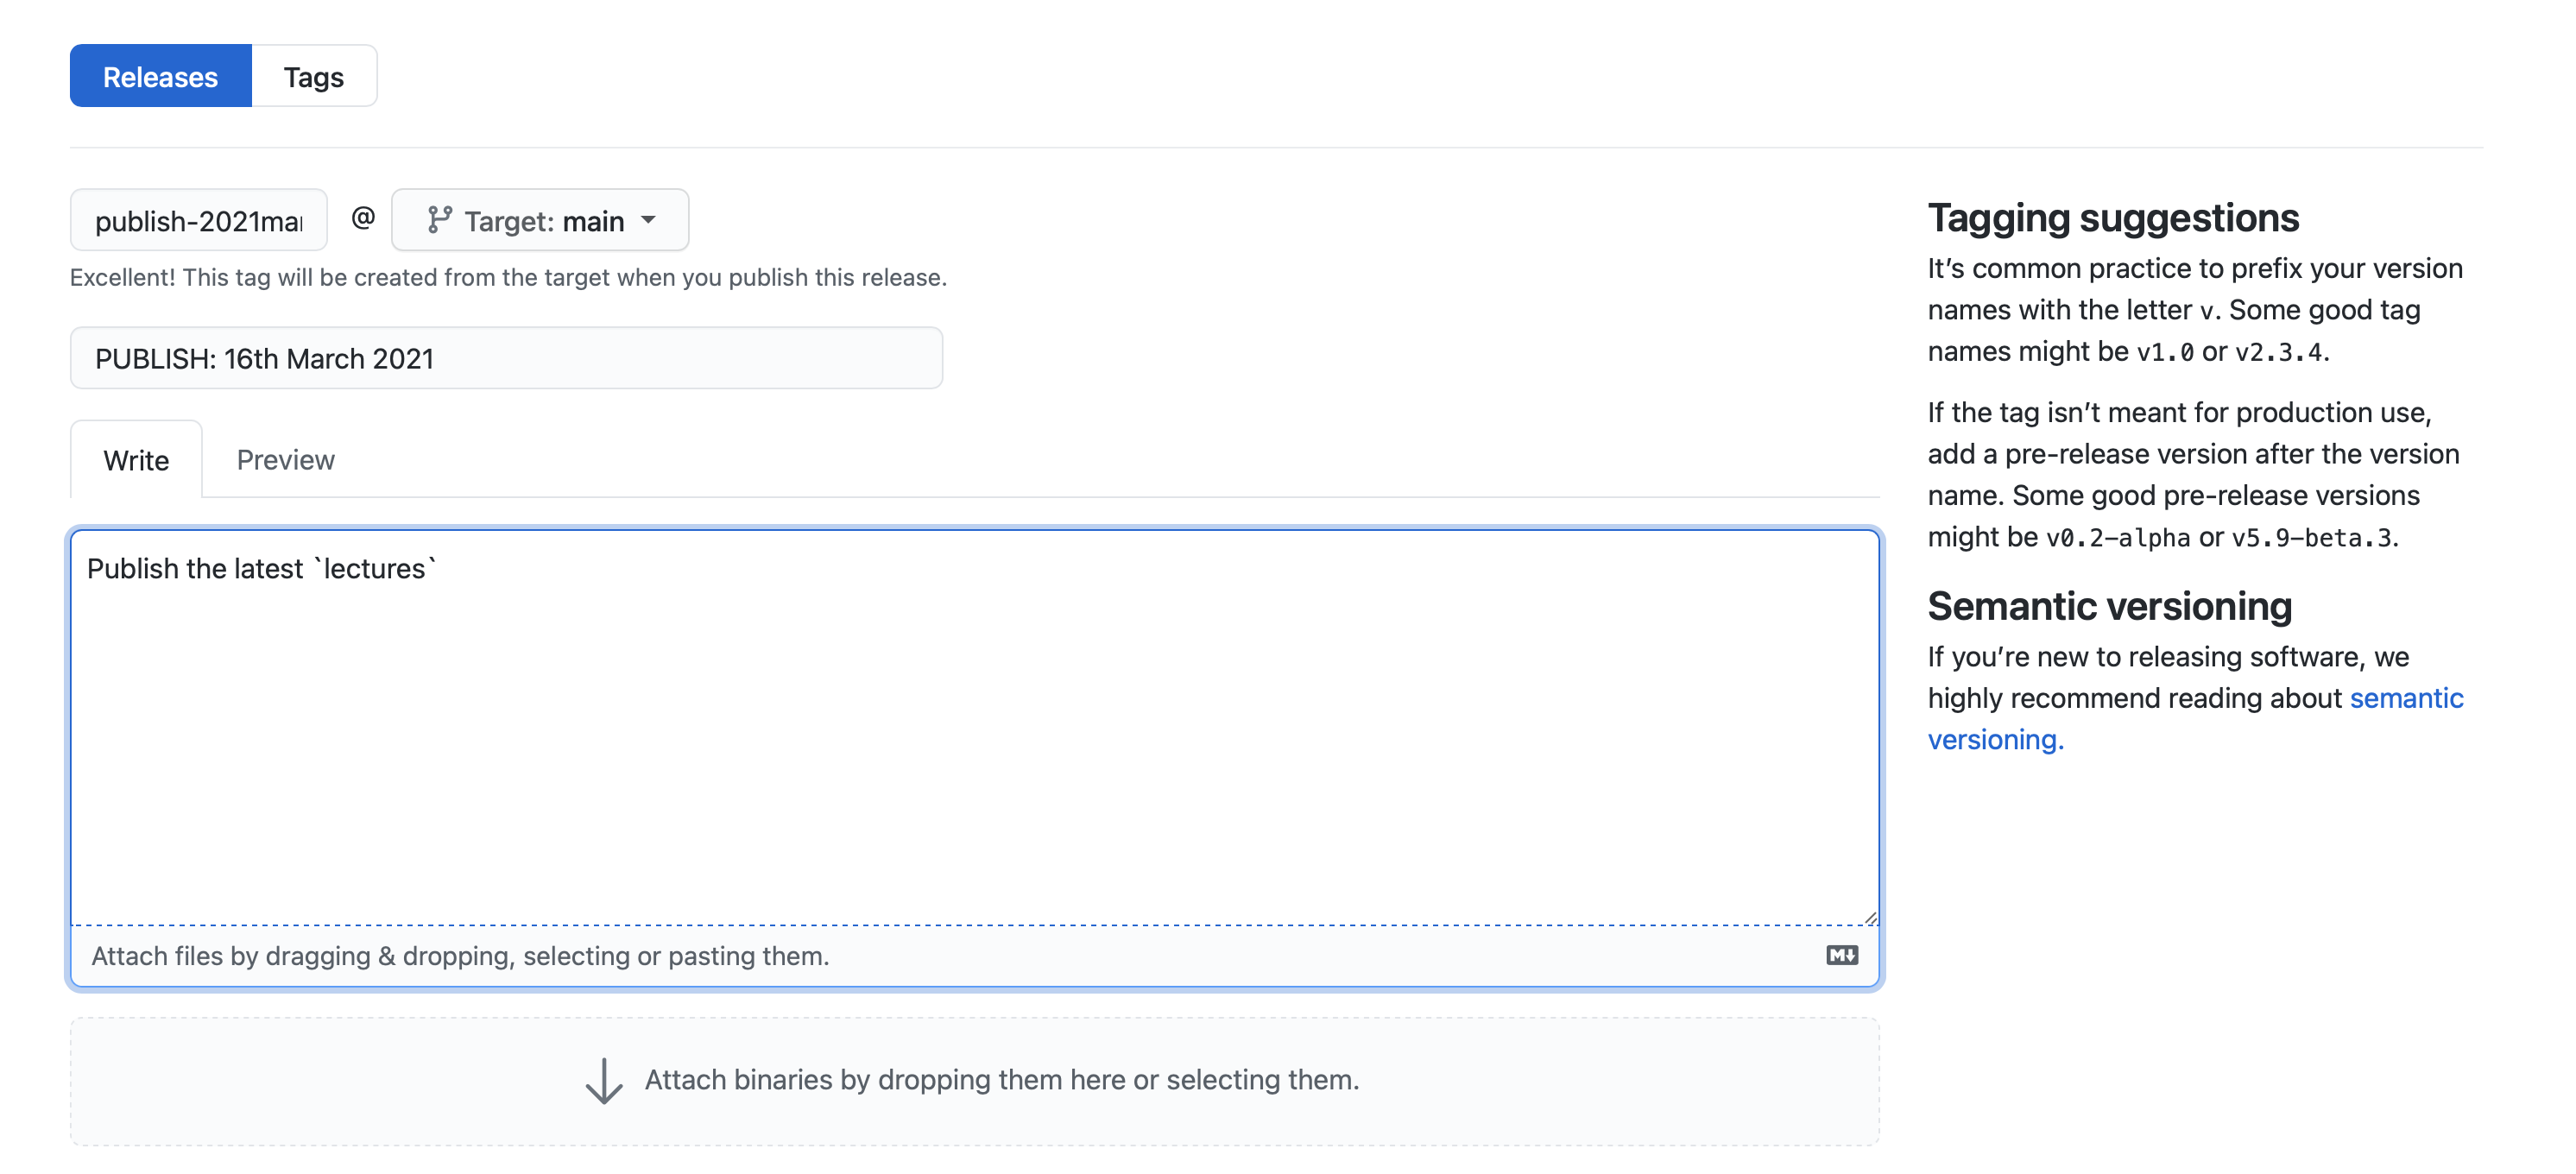
Click on
Generate release notesto auto-populate the description field with a summary of commits and contributors since the last release. This is a built-in GitHub feature that provides a changelog of pull requests merged and new contributors.Tip
You can customise the auto-generated release notes by adding a
.github/release.ymlfile to the repository. See the GitHub documentation for details on configuring categories and exclude labels.Click on
Publish Release
You can check the status by clicking on the orange circle:

once the status against the Build & Publish task turns green this indicates
the build and publish workflow has been completed and the live site will
be up to date within a couple of minutes.
Tagging a Release with the GitHub CLI#
The GitHub CLI (gh) provides a fast way to create
a release and trigger the publish workflow directly from the terminal.
Prerequisites#
Install the GitHub CLI if you haven’t already:
brew install gh
conda install gh --channel conda-forge
Authenticate once with:
gh auth login
Workflow#
Navigate to the lecture repository and ensure you are on
mainwith the latest changes:cd ~/work/quantecon/lecture-python.myst git checkout main && git pull
Create a tag and release in a single command:
gh release create publish-$(date +%Y%m%d) --title "PUBLISH: $(date +'%d %B %Y')" --generate-notes
This will:
Create a new git tag (e.g.
publish-20260415)Generate release notes automatically from merged pull requests
Trigger the
publish.ymlGitHub Actions workflow
Monitor the triggered workflow run:
gh run watch
Tip
You can also create a release for a specific commit using the --target flag:
gh release create publish-$(date +%Y%m%d) --target <commit-sha> --title "PUBLISH: $(date +'%d %B %Y')" --generate-notes
Building Locally and Push to GitHub Pages#
Warning
This workflow should only be used as a fallback if the automated publish infrastructure (GitHub Actions) is failing. Prefer using a GitHub Release or the GitHub CLI under normal circumstances.
Important
This ghp-import fallback only applies to repositories that still deploy to the gh-pages branch
(the peaceiris rows in the deployment table). Repositories that use the
native artifact deployment (inline or via quantecon/actions)
have no gh-pages branch, so this method does not apply to them — re-run their publish.yml workflow
instead.
These instructions assume you are at the base level of a QuantEcon lecture repository
such as lecture-python.myst
Note
QuantEcon uses the folder lectures to contain all jupyter-book documents
Lecture Deployment Status#
QuantEcon lecture repositories currently use one of three deployment paths. In all cases the publish
workflow is triggered by pushing a tag matching publish* (see Build and Publish via GitHub Release and
Tagging a Release with the GitHub CLI).
quantecon/actions (target) — native artifact deployment composed from the reusable
quantecon/actionslibrary. Nogh-pagesbranch. This is the target architecture and now covers most active repositories.native artifacts (inline) — deploys via actions/deploy-pages with build steps written inline in the repository’s
publish.yml. Nogh-pagesbranch. This was a transitional form on the way to the reusablequantecon/actionslibrary; the remaining inline repositories are being folded into the target path.peaceiris(legacy) — deploys to thegh-pagesbranch via peaceiris/actions-gh-pages. Only a couple of repositories remain on this path.
Repository |
Website |
Deployment |
|---|---|---|
|
||
|
||
|
||
|
||
|
||
|
||
|
||
|
||
|
Note
This table is maintained by hand and lists the most active repositories. To confirm the deployment path
for any repository, check the Deploy step in its .github/workflows/publish.yml.
Workflow#
Activate the quantecon environment using
conda:conda activate quantecon
Warning
Your
software environmentmay change how the site is built. It is important to use the quantecon environment to ensure consistenthtmloutput.Build
HTMLfiles locally using jb build commandjb build lectures
or if you are editing files in the
lecturesfolder you can usejb build ./
Build
IPYNBdownload notebooks locally using custom buildersphinx-tojupyterjb build lectures --builder=custom --custom-builder=jupyter
and copy asset to
_notebooksfolder in_build/htmlmkdir lectures/_build/html/_notebooks cp lectures/_build/jupyter/*.ipynb lectures/_build/html/_notebooks
Build
PDFbook style pdf locally using thepdflatexbuilderjb build lectures --builder=pdflatex
and copy asset to
_pdffolder in_build/htmlmkdir lectures/_build/html/_pdf cp lectures/_build/latex/*.pdf lectures/_build/html/_pdf
You can preview the
HTMLby following the instructions displayed byjupyter bookand open theindex.htmlfile located in your_build/html.chrome lectures/_build/html/index.htmlor if you are editing in the
lecturesfolderchrome _build/html/index.htmlopen lectures/_build/html/index.htmlor if you are editing in the
lecturesfolderopen _build/html/index.htmlUse
ghp-importto sync theHTMLfiles to thegh-pagesbranch usingghp-import -n -p -f -c <domain-name> -m <MESG> _build/html
where:
-ninstructsgithubnot to build your project using Jekyll,-ppushes the branch toorigin/gh-pages, and-fforces the push to the repository to ensure the transfer is made.-cadds aCNAMEfile with the custom domain settings-msets the commit message. Use a descriptive message such aspublish-<date>
ghp-import is a tool that will publish a directory of files such as the
_build/html/directory into thegh-pagesbranch of a repository and push them togithubfor publication. This tool willreplacethegh-pagesbranch with the contents of what you point at it so it should be used carefully.Note
If
ghp-importis not installed you can do so usingpip:pip install ghp-import
this tool is provided in the quantecon environment
Additional details are provided in the jupyter-book documentation